


Origami - the creation of various figures from triangularmodules. This technique was invented in China. The figure is assembled from the same elements - modules, which seem to be embedded in each other. In this article we will tell you how to collect an origami swan from modules. The main thing - have patience. Good luck!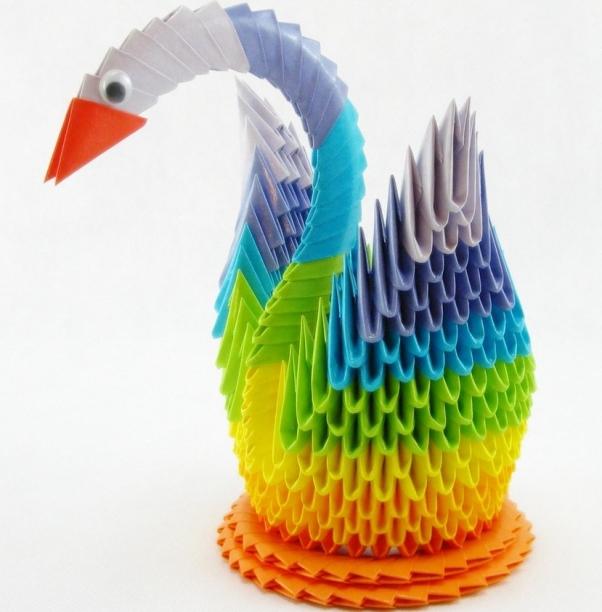
How to make a triangular module
For the manufacture of modules is best suitedoffice paper and magazine clippings. But do not use colored school paper - it is too loose, thin and breaks on the folds. Take the sheet A4, divide it into 8 equal parts and add the module. So, before us is a rectangle, we bend it in half, so we have centered. Unbend it back. The edges on both sides are folded into the middle. Turn the workpiece over. Now bend the lower corners. The lower half is wrapped up. The resulting triangle is doubled.
We will create a multi-colored figure. We need the following number of modules: 60 yellow, one red, 36 blue, 39 blue, 136 pink, 90 orange, 19 purple and 78 green.
Scheme of origami "Swan" from triangular modules
We take three pink modules.We connect them: we insert the corners of the two modules into the two pockets of the third. Add in the same way two more triangles to the first group. The result is a ring that consists of the inner (the modules on the short side stand) and the outer row (on the long side). Next, each row should be composed of 30 elements. The third row is made up of orange modules, we put them on in checkerboard order. Similarly, we collect the fourth and fifth rows. Grasp the edges of the workpiece with your fingers, do the following - gently turn the ring inside out. The sixth row consists of yellow modules, we put them on top.
Assemblage of wings
From the seventh row we begin to make wings.First, select where the head will be located at the swan. So, the seventh row should have two gaps and consist of 24 yellow modules. We collect the figure according to the following scheme:
- In the 8th row there are 22 green modules.
- From 9 to 10 rows, the number of modules is reduced by two elements.
- In 11 rows there are 16 blue triangles.
- In the 12th row, we reduce the size of the two modules.
- In the 13th row there are 12 blue elements.
- From 14 to 15 the row for two modules is smaller.
- In the 16th row there are 6 purple triangles.
- From 17 to 18 a number of elements are reduced by two modules.
Wings of origami "Swan" from the modules are ready. Give them a shape to the top, they slightly bent, and the bottom were slightly convex.
Assembling the tail, neck and stand
We proceed to create the tail.We make it from five rows, using 12 modules of green color and 3 - blue. To collect the neck, you need to attach to the red module seven purple. Try to immediately give the neck an elegant bend. Next, you need to insert six pieces of modules - blue, blue, green and yellow. Strengthen the neck between the wings. You can decorate the craft with a bow and eyes. We make a stand for a swan in the form of two rings. The first consists of 40 orange, and the second of 36 same color modules. Rings can be glued together. Multicolored swan from the modules is ready! He will long please the eye and cause admiration of your guests.

The creation of this craft is completely manualJob. It takes a long time, because the figure consists of a huge number of elements. But after all, the result is worth it. You can tell your child how to make a wonderful origami "Swan" from the modules, and together (or three) to make a couple more wonderful crafts ... Children such an occupation will certainly delight, and besides, will also contribute to the development of fine motor skills.


