


Bought in the store a case for a tablet - thatcan be more boring? Original, such as no one will ever see, tablet cases made with their own hands, cause warm feelings and joy of possession. If you are overwhelmed with the same emotions, you are exactly at the address. Worried that they never made covers for the tablet with their own hands? Do not worry, it's easy to learn!

Step 1
Так как мобильные устройства у всех разные не only on the model, but also on the size, then there will be different covers for the tablet. Measure the length, width and height of your highly intelligent mechanism with your own hands. Record the received data.
Find a very dense cardboard, such as hard covers of books. Instead, you can use the chipboard. Cut out five parts from the prepared material, as shown on the sample:

In our case, their size corresponds to such parameters:
Notice that the two largest parts are not the same. One little more than the other! This is necessary for the natural girth of the tablet cover.
Step 2
This step-by-step instruction how to doa case for a tablet with own hands, the most exciting. After all, picking up the fabric for the future sheath means expressing your self, your own personality, character and preferences.

So, the choice is made.Open from the material three rectangles, one of which should correspond to the height of the cardboard blank, and its length will be the width of all the hard parts together. The second flap should be equal to the dimensions of the first three carton rectangles. The third cut - the size of the remaining two cards. Do not forget to add one to two centimeters to the seams.
Step 3
Another important component is the elastic band:

Step 4
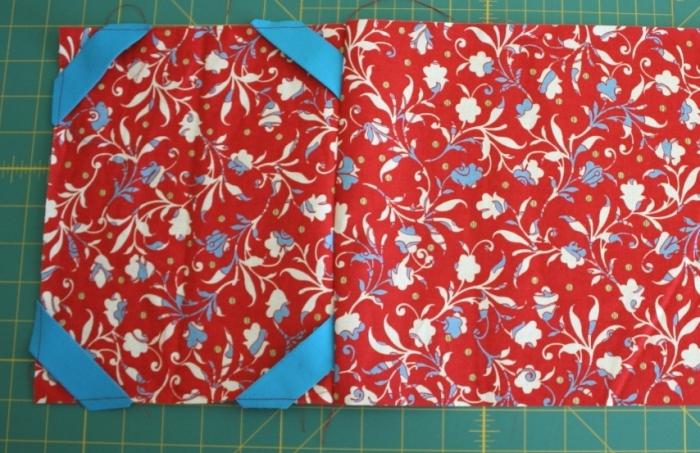
Sew to the corners of the smallest rectangle of fabric cuts of the elastic band:

Step 5
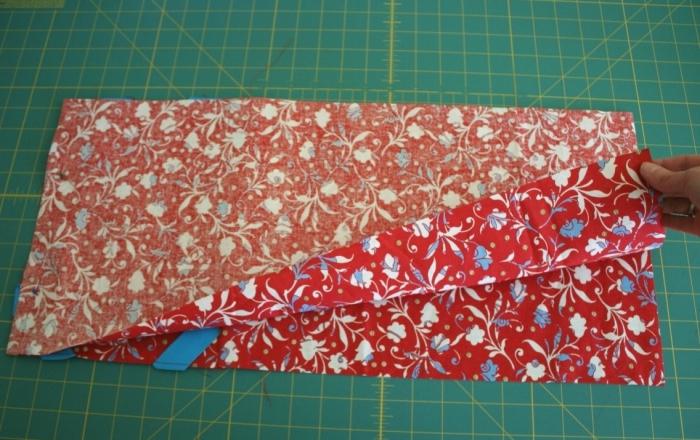
Fold the received part with a rectangle of medium size with the inside sides:

Sew the parts. Here's what you should get:
Step 6
Pin the side of the future boot with pins:
Place the elastic band between the elements at the level of fixing the corners:

Step 7
Stretch the future cover from three sides:

Step 8
Turn the cover over the face. On one side, there must be a "set" of elastic corners:

... on the other - a rubber band for the entire height of the cover:

Step 9
Insert a cardboard rectangle inside the cover. Fix the part with the machine stitch:

Insert the other cardboard pieces one at a time, fixing each in its place with a seam.
Step 10
As a result, when all the details take their permanent position, there will be two centimeters of free tissue left:

Fold the remainder neatly inside the case:

Slip stitches side:

Update is ready!
Try this on your tablet:

Would you like to read the news? Fold it like this:

Watch the movie conveniently in this position:

It's not difficult to make covers for a tablet with your own hands. Maybe you should think about making unique folders for notebooks and papers? The principle of work is the same.


