This is the most important tool that youcome in handy. Now in shops it is possible to find a lot of such devices of different brands. There are also qualitative, and not very. There are quite primitive airbrushes for 20 conventional units. And you can see the tools worth several hundred dollars. To make airbrushing on helmets perfect, do not try to save on this device.

There are two main types of these devices:with a dependent, as well as an independent method of dispensing the coloring matter. What is the first? In this case, the substance under pressure of oxygen passes from the tank directly into the nozzle, and then it is sprayed in the air.
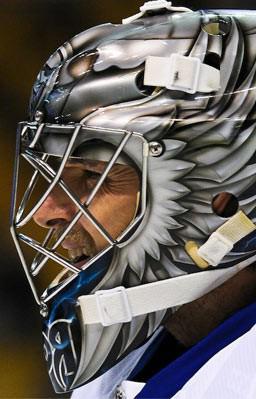
This process is similar to whitewashing with a vacuum cleanerusing a special nozzle: the amount of paint depends on the air pressure. Hurry to buy this device. Aerography on the goalkeeper's helmet, for example, looks great. If you play hockey, then you'll have it very handy.
This device is designed to provideairbrush by air. The most common are piston, as well as membrane devices. The most budgetary compressors are sold for about $ 100, but with the help of them it is impossible to perform really high-quality work. Therefore, it is recommended to buy special devices for the airbrush. The cost of foreign compressors ranges from 300 to 500 dollars, and Russian is slightly cheaper. If you are limited in means, you can buy a used device. Be that as it may, a qualitative drawing requires a pressure of 200-500 g / cm2. This is an important point. Remember: airbrushing on hockey helmets should be done qualitatively and diligently.

If you want the paint to stick tohelmet, it should be properly prepared for subsequent work. It is necessary to make sanding, then degreasing, and at the last stage - priming. As for the latter, there are many good varieties of it. For example, good results can be achieved with GF - Russian glyptal primer containing solvent No. 646. You can safely buy it - airbrush on helmets will be very good.
As for solvents, there are both"Light", and "heavy" - it all depends on the speed of evaporation. The first includes ethers. Such solvents evaporate almost instantly. And "heavy" contain substances such as xylene, toluene, benzene, as well as oily elements. All this contributes to a longer evaporation. As a rule, 647th as well as 646th number of solvent are used for airbrushing. In addition, acetone is used. Take this into consideration if you want the airbrush on the goalkeeper's helmet to turn out beautiful. Do not neglect these recommendations.

For aerography, nitro-dyes can be used.Already in the process of drawing a person is determined with their consistency. Also, special paints can be used for this type of creativity. Where can they be bought? As a rule, they are found in art salons and special shops.
If you are a beginner, you can not hope that you haveThe first time will be a beautiful image. Perhaps you will have to paint several helmets, and only after that you will start to get it. At first, it is recommended to draw with the use of a stencil. Consider how to draw a flame. Three colors are used to perform this pattern.