


The element of arrangement of landscape design inA modern garden is a rock garden. The work of specialists in its creation sometimes results in fabulous amounts. But the executed Alpine slide with their own hands, the scheme of which is presented here, will save considerable money.

Step one
So, the alpine slide.A step-by-step instruction for its arrangement presupposes the need to select a suitable site. Now it is important to imagine this future decorative highlight. Preliminary drawn schemes of Alpine hills will help to clarify their vision of the future decoration of the site. Be sure to show the paths leading to the structure, the location of the largest stones.
Step Two
An important stage of the work will be the layout of the site. Having planned a perimeter of the future garden decoration with a shovel, it is necessary to excavate the soil, taking off approximately a layer of earth in 40 cm.
Step Three
Prepare gravel crushed stone.He will lay a drainage layer that is fifteen centimeters thick. Be sure to crush the rubble and carefully watered. The role of drainage is to remove excess water. Excess moisture growing in stony terrain plants is harmful. Further, the same layer of sand is laid in the thickness. Warn the settling of the slide will help its good ramming and watering. Such an alpine slide, the step-by-step instruction of which is proposed, will be quite stable.
Step Four
Now the soil will be needed.Its looseness and nutritiousness will improve coarse-grained sand and peat. All components are taken in an equal proportion: 1/1/1. The layer is still tamped. The thickness of it will be the same. It is better to use the purchased soil, as there are no weeds in it that can kill all the plants. Otherwise it will be necessary to disassemble the structure in order to get rid of them. Alpine hill, step by step instruction of the construction of which will be an indispensable assistant, will become a clear decoration of the site.
Step Five
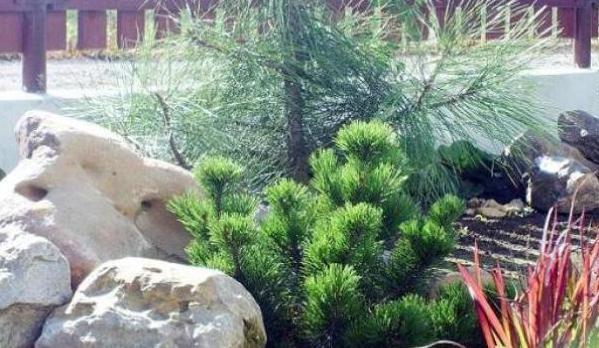
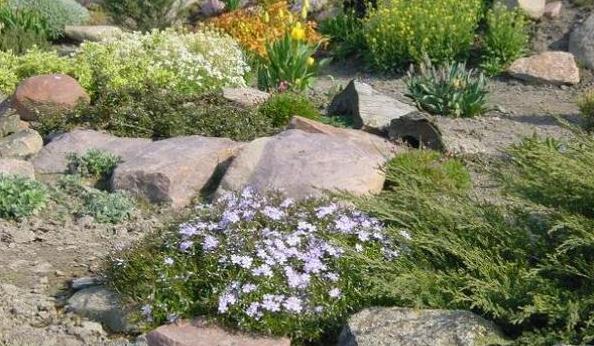
Stone laying.First, the largest stones are laid. For reliability they are buried. The Earth is peppered with 2/3 of their height. You also need to check how stable they are. The small pebbles put under the bottom will help to correct the revealed shortcomings. The symmetry of stacking here is not good. Only chaotic placement of the stone will resemble natural hills. Do not forget about the natural vases, in which plants are placed. Alpine hill, step by step instruction which recommends the use of flowerers from logs, stumps and fragments of tuff, will look just great.
Step Six
The final one. It involves the planting of plants.The selection of them is not so simple. It should be remembered that plantations should not displace each other. The help is to view photos with the finished songs. In order for the rock garden to bloom for a long time, it is necessary to select plants with different flowering periods. Plant them from the top down. A groove is made near the stem, fine pebbles are poured on top.
Everything is very simple:weed clearing and careful regular watering. And with the onset of cold weather, it is necessary to tie branches of coniferous plants with a rope (if they are, of course, there are). Then heavy snow will not hurt them, and in the spring they will rejoice you with their beauty again.


